Export a Heroku Postgres table to a csv file
August 21, 2016
This post will be a walk through of how to export a Heroku PostgreSQL database, table, or query to a .csv file. Its worth noting that if the goal is to export Heroku's database and import it into another (like localhost) there is documentation for that in Heroku's dev center.
Two methods of accessing a Heroku hosted Postgres database will be covered in this post.
- Utilizing the Heroku CLI to connect to the postgres server. Then issuing commands via the console which will require postgres be installed on local machine.
- Utilizing pgAdmin's GUI which does not require that postgres be installed locally.
Database Credentials
Heroku has a page that shows all postgres databases associated with an account located at https://postgres.heroku.com/databases. Going to this page and navigating to the appropriate app will yield connection information to access the database. Different parts of this connection page will be used for each method of exporting a CSV.
Heroku CLI
After looking up the database information copy the value for the Psql connection setting and paste it into the terminal. Being logged into the Heroku CLI is required to execute the Psql command $ heroku login.
heroku pg:psql --app amazing-wetland-1234 DATABASE
At this point it's now possible to run queries on the database. To start enter $ \dt which is the equivalent of a MySQL $ show tables.
List of relations
Schema | Name | Type | Owner
--------+-------------------+-------+----------------
public | schema_migrations | table | <redacted>
public | posts | table | <redacted>
public | users | table | <redacted>
(3 rows)
Now that its clear a connection has been made successfully the \COPY command can be used.
Export Entire Table
\COPY users TO '~/user_export.csv' WITH (FORMAT csv, DELIMITER ',', HEADER true);
The above command will export all the rows and metadata of the users table to user_exports.csv located at in home directory. the HEADER option means that the table columns are included at the first line of the csv file like below.
id,email,encrypted_password,etc,etc
1,example@domain.com,2a10iOnKWh6MGprDXxlS,etc,etc
Export Specific Query
\COPY (SELECT * FROM shifts WHERE user_id = '7') TO '~/shifts_export.csv' WITH (FORMAT csv, DELIMITER ',', HEADER true);
The above command will export a csv file in the same way as the previous method. The difference being only the query results are being exported; not an entire table.
pgAdmin GUI
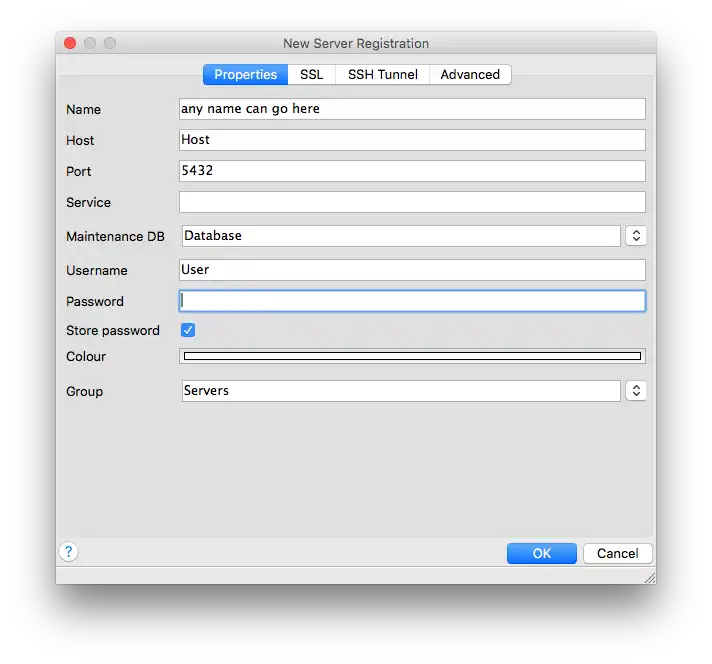
The first step is to add a new postgres server by going to file > add server.... The Properties and Advanced tabs will be the only ones used on this window.
Under the Properties tab match the information with the Heroku connection settings page of the app discussed at the top of the post.
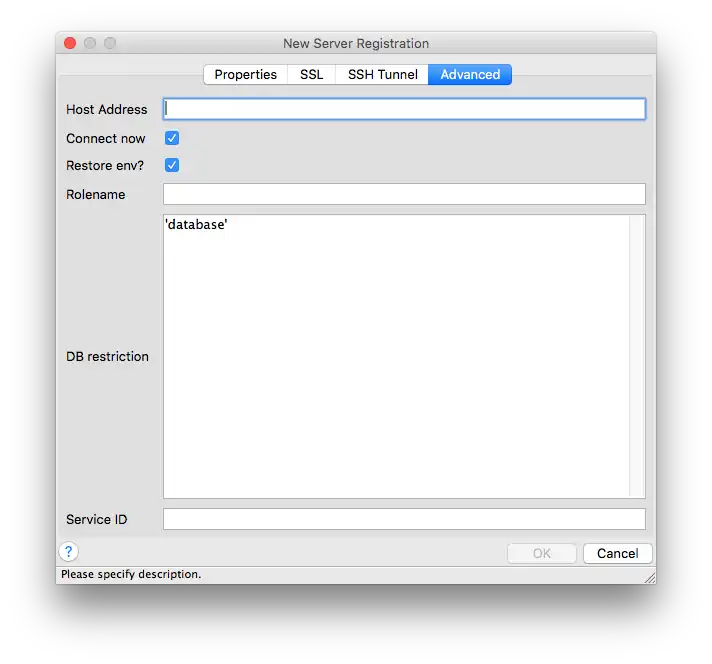
Under the Advanced tab add a DB restriction of the database surronded by single quotes. Heroku hosts many postgres databases on a given server; without adding a restriction all databases will be shown and make it hard to connect to the right one.
Upon connecting to the server select the database name from the Hierarchical menu on the left and side of the UI. to run a query pull up the Query Tool by going to tools > query tool.
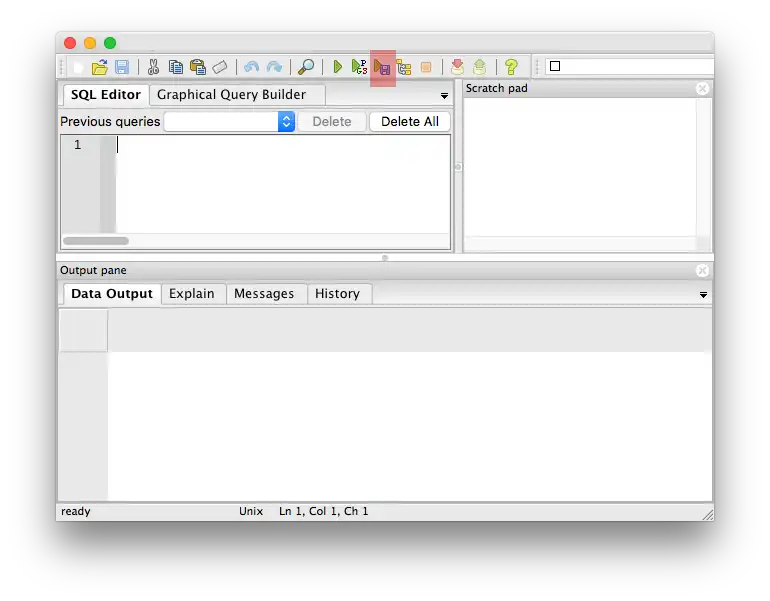
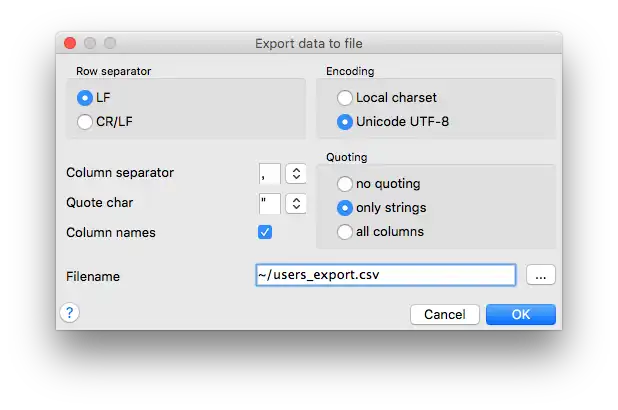
The highlighted button will run the query then write the results to a file. Any query can be exported to a file and to export an entire table run the following query: SELECT * FROM table. Make sure to append the filename with the .csv extension.